
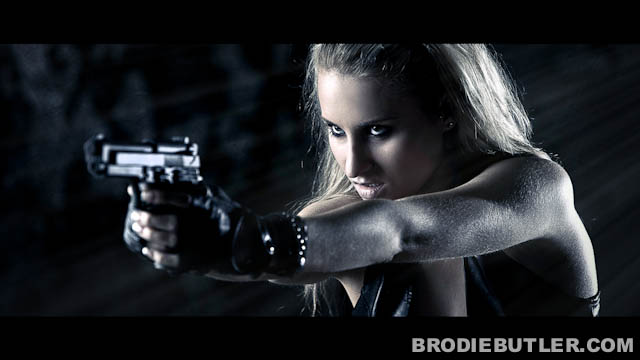

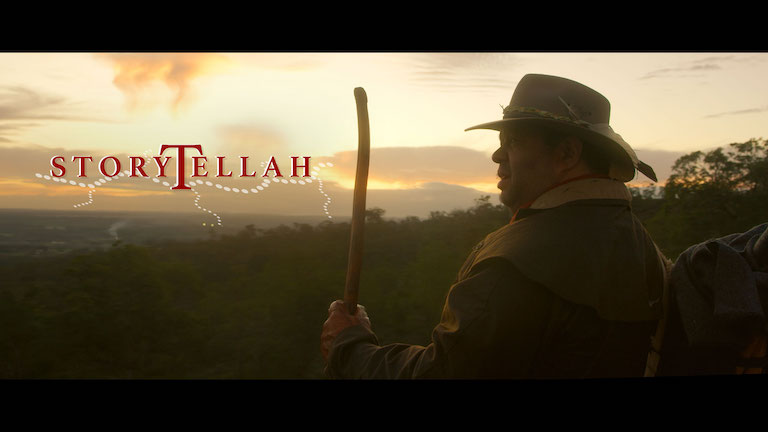
If you didn’t already know I am also a very keen filmmaker and I absolutely love cinemascope, which is the widescreen format common to motion picture films. In this tutorial I will show you how you can turn your images into a cinematic masterpeice and how to do it correctly with the correct aspect ratios, just like I have done with this image above. It’s not quite as simple as cropping your image and adding a couple of black bars (for the letterbox effect).
I’m going to show you how to crop your image to the correct cinemascope 2.35:1 ratio for that really widescreen cinematic feel, and create black bars (letterbox) which will extend your image to fill a 16:9 ratio which is the international standard for High Definition TV. So your end result will look just like a screenshot from a film like my example above. 16:9 is the ratio that your HDSLR cameras capture video at. Both 1080p and 720p share this ratio. So this tutorial is basically taking an image and conforming it to the same ratio as your video files, then we are applying a further crop to make it even more widescreen, adding the black bars for the letterbox effect.
Read on for the free video tutorial and more examples…
Here is the tutorial:
TIP: A good idea is to duplicate your background layer so if you muck things up you can re-do your crop at a later stage.
NOTE: I have used the 2.35:1 cinemascope which i think is more commonly used. Alternatively cinemascope can also refer to a 2.39:1 aspect ratio. I’m not a cinemascope/panavision expert, if any filmmakers want to comment on this please do!
NOTE: Yes, all of these images were taken by myself and post processed in photoshop by myself. 🙂
Well this was my very first photoshop tutorial to kick off Photoshop Fridays on my blog, so I hope you found it useful. Like anything in photoshop theres always plenty of different ways to achieve the same thing and this is the best method that works for me.
Here are some more examples using this technique:


If you are a photoshop enthusiast, whether your a beginner or a pro, I highly recommend becoming a member of the National Association of Photoshop Professionals. It’s the best way to stay up to date with everything Photoshop, and have access to tonnes of free tutorials and a massive help-center. Not only that but your small annual fee gets you 10 issues of Photoshop User Magazine per year!
Hope you enjoyed this tutorial, please drop me some comments!


6 Comments
Hello Brodie, Nice step and my congratulations for your first tutorial,
then Cheers for your works . .
Amila C.
Pingback:Tweets that mention Photoshop Friday: Give your images that cinematic widescreen look | Brodie Butler Photography -- Topsy.com
Hey BB, twas a great tut, very happy that i learned something and look forward to learning more
ciao for now..
Drewski
bro……thanks….
Hey Brodie, thanks for the tut! It was really clear and definitely helpful!
Cheers
Dave
Thanks alot my students did this tutorial today!
Very nice blog design 🙂