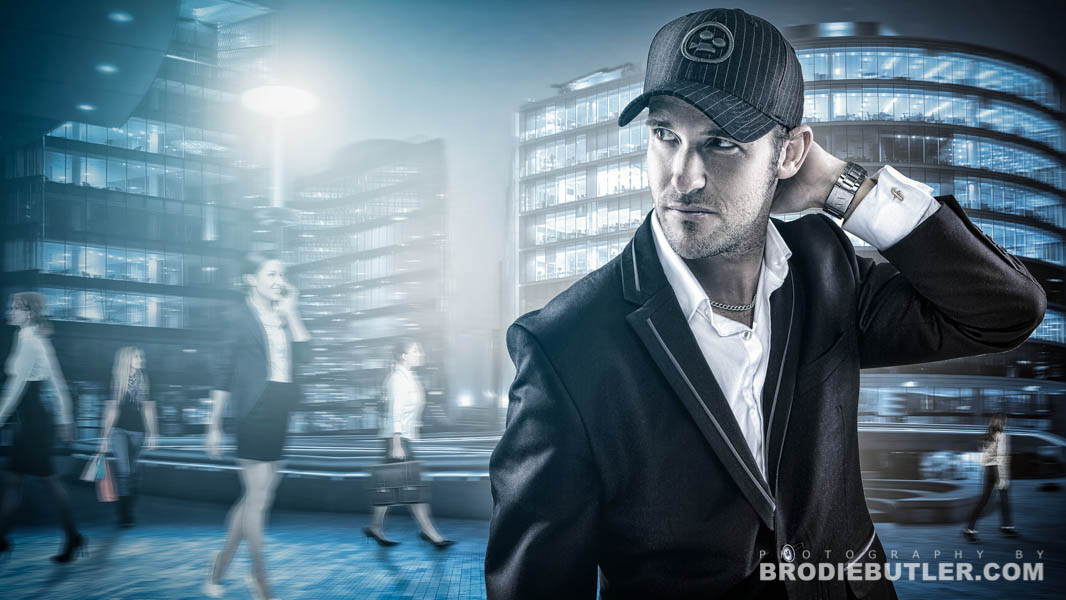
L.A. Based Director A.J. Carter dropped back to his home town of Perth, Western Australia back in 2012 and made use of this trip home as an opportunity to get himself a fresh new portrait done by yours truly! It’s refreshing to know that a Perth photographer like myself still has something to offer to someone who spends everyday in Hollywood. This actually turned out to be one of my favourite images, one of those images that I keep coming back to look at. Thats a good feeling, as you know you’ve done something good and made ourself proud.
Like most of my creative portraits, this was shot in a studio. It’s funny… as a location shooter for so many years, I avoided the studio like the plague. I used to shudder at the thought of one. These days though, my work is evolving and I’m actually finding plenty of uses for the old white seamless, but I use them because I need to for a specific job, I’m not using them by default and I think thats an important distinction.
So since A.J. was shot in a studio on a white seamless, combined with the dead giveaway in the title of this post, this image is a composite. It is a blend of many different images to make one. This is where stock images come in real handy. It can be difficult to get out and shoot your own backgrounds and other subject matter, so stock images give you an alternative. I try to shoot my own backgrounds as much as possible because it saves you any licencing dramas, plus its more of your own work in the piece. However, this just isnt always possible so I too have a stock image account.
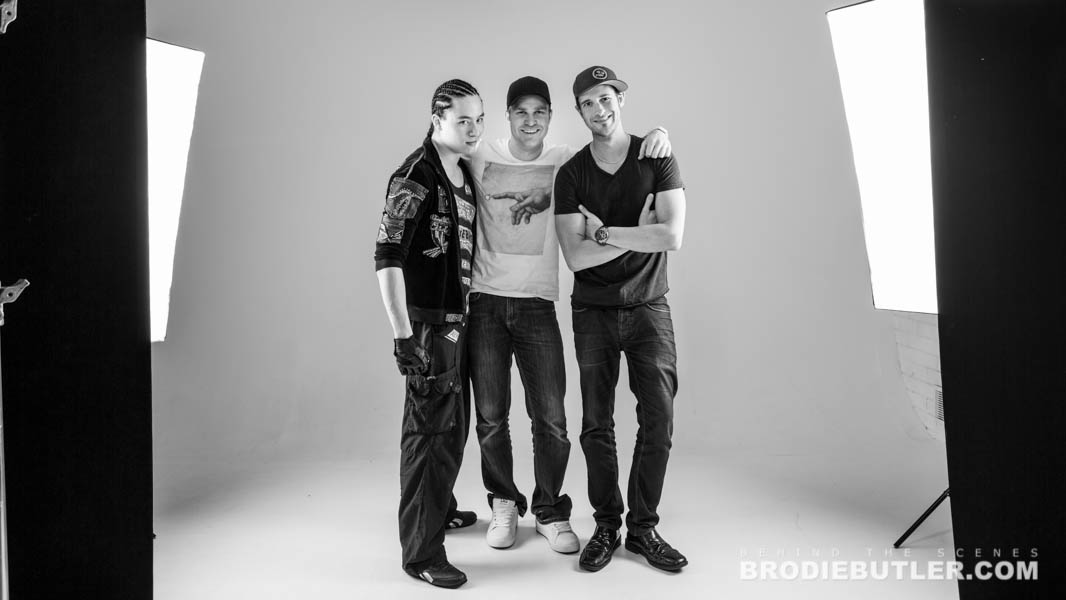
This silly behind the scenes photo below gives you an idea of the setup I used. It’s very simple, but it’s very specific, and the lights need to be in just the right spot on just the right power to make the magic happen that I’m after. This is not the most ideal setup, but its the best I had to work with given the studio we had.
In the photo you can see my assistant Karl Pearce(left), Director A.J. Carter, Dancer Axel Nu, and Myself.
Read on for more info about the lighting setup, camera, and who else was at this photoshoot!
There is no universal lighting setup in a studio and thats not as obvious to some people as you might think. I see people all the time that use the same exact lighting setup to shoot everything that walks through their door. Make it interesting people! Put some thought into your subject, and what you’re trying to achieve and light it accordingly!
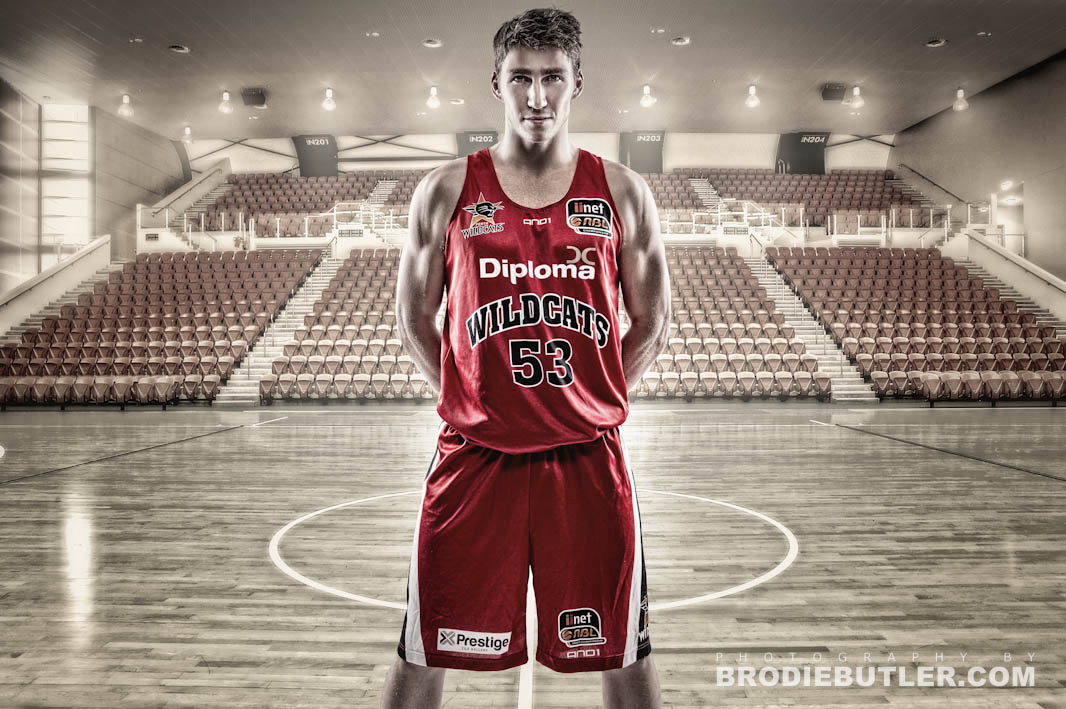
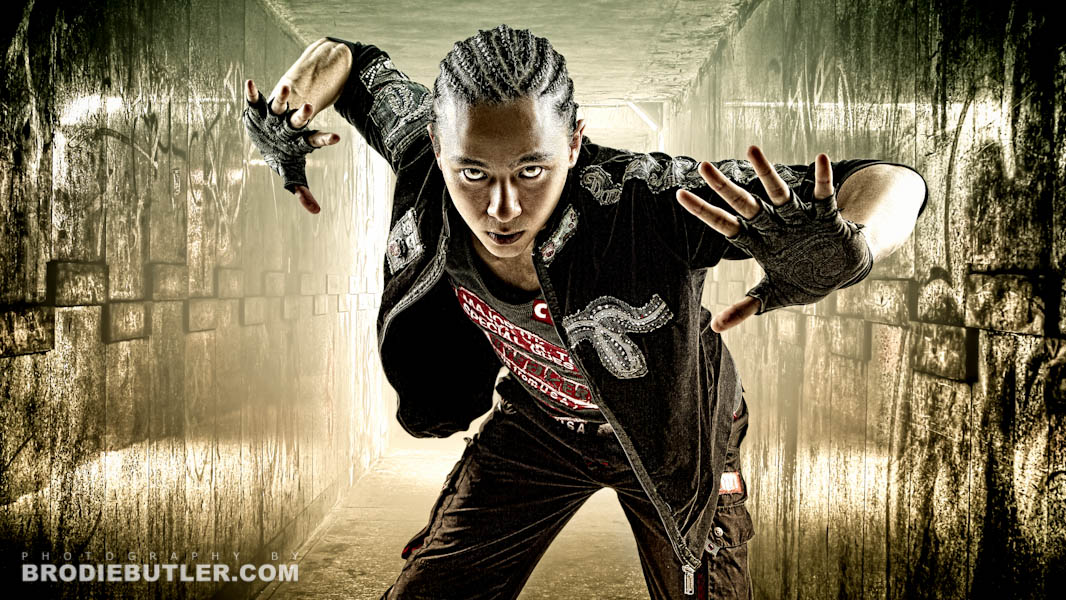
This was actually a pretty special photoshoot for me, as I managed to get 3 amazing talents all under the one roof at the same time. Obviously A.J. was there fresh from the USA, but I also had an amazing dance talent, Axel Nu who is now overseas sharing his talent with London. Last but not least, the consecutive 3-time winner of the NBL’s Best Defensive Player of the Year award, basketballer Damian Martin from the Perth Wildcats! Now thats my kind of portrait session! I don’t own a studio, so I managed to get these guys together to make the most out of renting one.
Let’s quickly have a recap on their images. Here’s one of the portraits I shot for Damian Martin which I originally posted on the blog here. The background image in this case is the main court at the W.A. Basketball Centre in Subiaco that I photographed.
Axels Nu’s image below has a bit more edge to it to reflect his urban dance style.
Now for some more technical stuff…
THE CAMERA
All these images were shot on a 5DMKII. The lens I used, probably comes as a suprise, especially anyone that knows me and my photography. I used a 16-35mm 2.8 L lens! Well to be honest I think I may have switched to a 24-70mm 2.8 L at times, but the bottom line is I was up super close and shooting pretty wide.
I had two main reasons for doing this. Firstly, I wanted to be right up in their face, up close and personal. The second, and probably more important reason, is that I wanted the focal lengths and perspective to match with the backgrounds, because they too were shot with wide lenses.
Typically I wasn’t trying to shoot full body images, so I didnt have to worry about distortion of the image being on such a wide lens.
THE LIGHTING
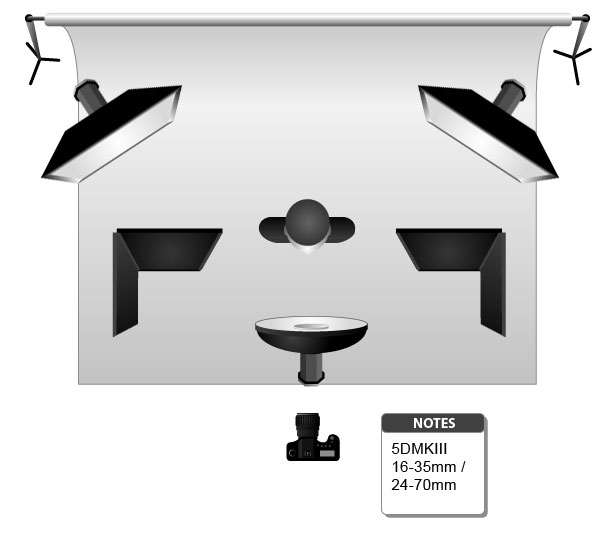
Lighting is always best described with a diagram, so here you go. Two large softboxes behind the subject roughly at 45 degrees. I would have used grids on these softboxes if they were available.
I had two large V-Flats (gobos) to block out those rim lights and prevent any flare I might get in camera. They also helped keep my subject positioned in the right spot.
Then finally, I had a beauty dish front and centre and above eye level. The dish was probably about a 70cm one, I forget. I then had the camera setup on a tripod (for the most part) which was pretty much underneath or very close to the beauty dish.
The two softboxes at the back are actually doing most the work. The beauty dish was then dialled in as a fill light until it “felt” right. I don’ t have any magic ratio, nor do I have a meter reading of each light. No light meter is going to tell me how much light I want in a creative portrait. For these, I just kept adjusting until it gave me just the right amount of mood with just enough detail in the shadows.
THE POST PRODUCTION
The fundamentals of this image are explained in a previous blog post where I show you ain in-depth look at my post production process. So if that interests you, check out this post here:
That post also links you to other previous posts with very helpful tips on blending and composoting among other things.
So there you go, another sneak peek into the way I construct my creative portraits. Hope this helps you all and I hope you enjoy the pictures! Feel free to ask me any questions about it all!
Brodie.

