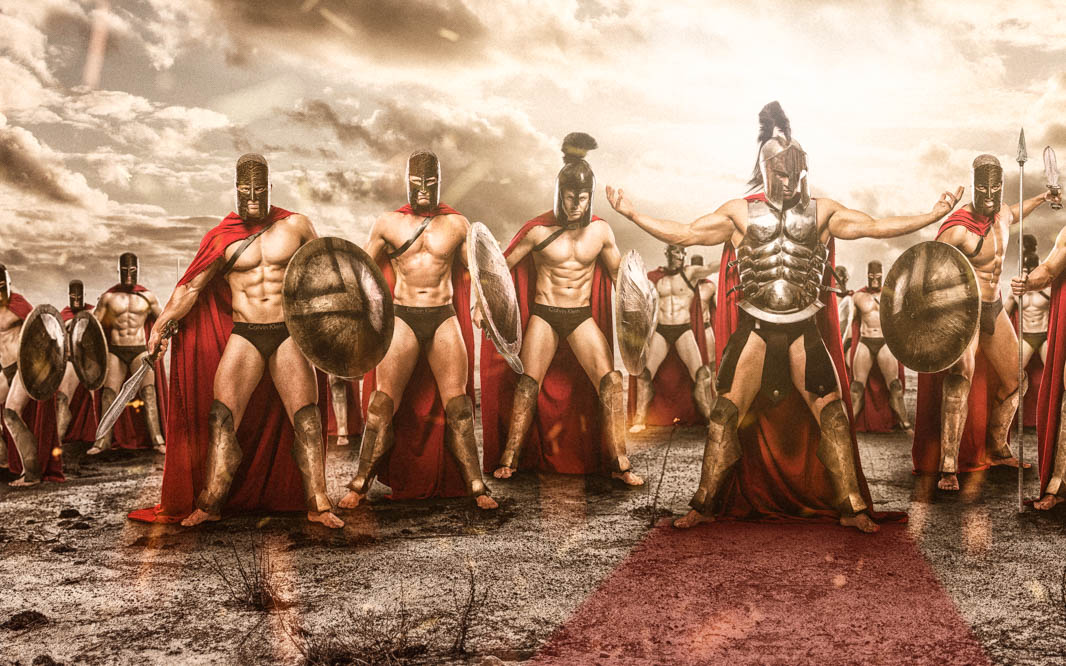
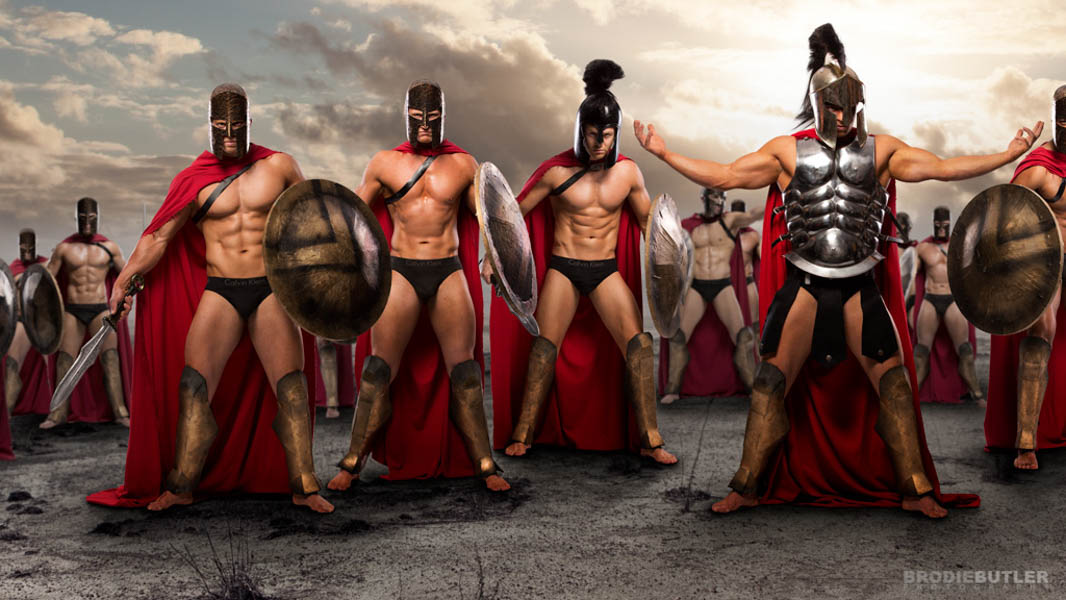
This giant photoshop composite of battle-ready Spartans makes up an incredible 230 Megapixels in size and took 2 days to create. The boys behind the cosplay efforts in this masterpiece are the Perth dance group Top Shelf Entertainment. I think this is officially the largest composite I have ever done!
About 9 years ago I actually created a Spartan photo for these guys, and it has come time to renew the imagery for an updated show, so the bossman at Top Shelf headquarters; Leigh, called me up and asked me if we could up stage the last one. Well I certainly love a challenge, and I think it’s fair to say my skills have progressed just a tad since 2009. Looking back, I think we made a pretty good improvement! Now lets dive in for a look behind the scenes and how I put it all together.
Read on for behind the scenes, photos, tips and a speed retouching video!
THE STORYBOARD
Before putting together a composite it’s both advisable and beneficial to have some sort of storyboard of what you are trying to achieve. Usually Leigh and myself plot it out before the shoot day so we have a vague idea of the direction we are taking. Then on the day we spend some time to choreograph how the final composite will look, placing the guys in different positions and working out what is going to look best. We will often have multiple arrangements so we have some backup plans up our sleeve and that gives me a lot of flexibility in post production.
Once we have the formations worked out, it’s up to each individual guy to remember their positions and poses while I photograph them individually. How they are angled and which way they are facing is very important to make the whole picture come together afterwards.
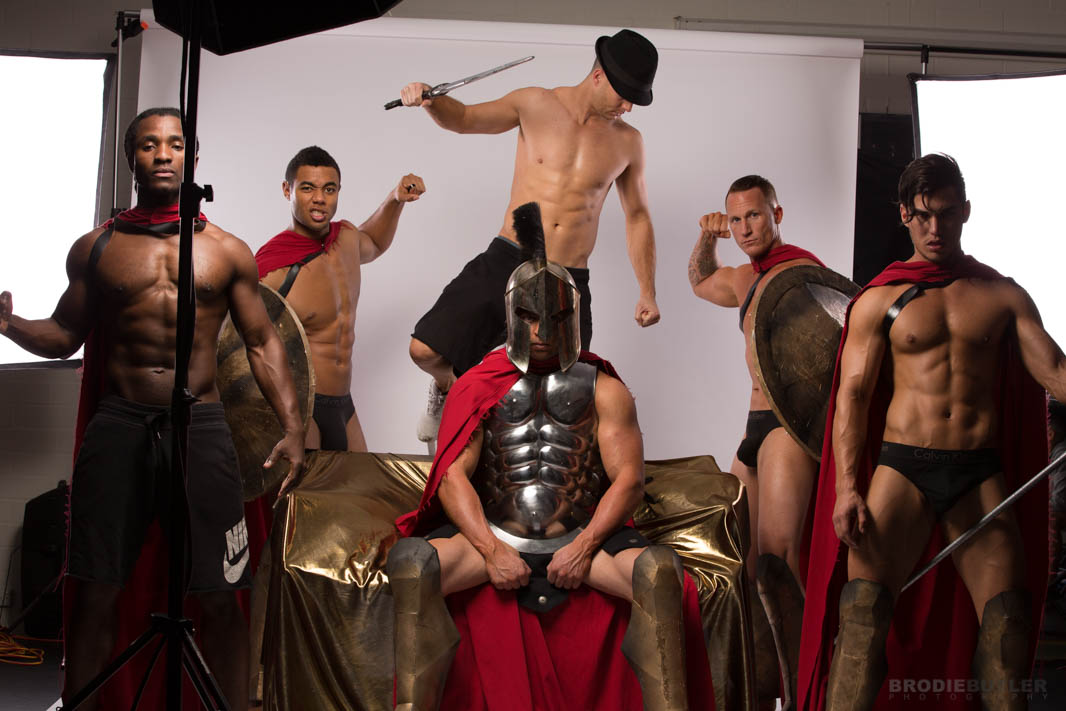
Below is a couple of behind the scenes images of the guys trying to piece together the formation of the Spartans. These formations obviously didnt make it to the final cut as we decided to have the King standing and we removed the jumping spartan in the background. Once we found the formations we were happy with, each subject had to remember their pose, and then we brought them in one by one to photograph.

WHY SHOOT THEM INDIVIDUALLY?
Good question. There’s a number of reasons. Firstly, there’s too many of them to fit onto my 3m wide seamless background in the tiny studio office we were using. That makes things harder to shoot and a bit harder to extract the background in photoshop after the fact. It also means that whatever group formation we photograph is what we are stuck with. There’s no chopping and changing, and no flexibility. By having individuals I can not only rearrange them but I can create tangeant works later using any number of Spartans required.
Shooting a group is also much harder to light than just one individual, especially in a smaller space. It’s harder to control the exact lighting on each individual. The main light just wouldnt have the same effect. Last but not least, by shooting the Spartans individually, I am able to utilise as much of the sensor in my camera as possible for that one person. Filling the frame with them and extracting as much detail and quality as I possibly can to give me the best quality product that I can get. If you have ever photographed a group of people you will notice once you zoom in on each person the resolution just isn’t there and the quality isn’t great. It becomes a bit pixelated, where-as having all this extra resolution means I can zoom right in and retouch them to the best of my abilities and it makes for a much higher end product. Not to mention being able to print super large. If I was using a 100 megapixel camera it might be a different story, but I would still shoot them individually.
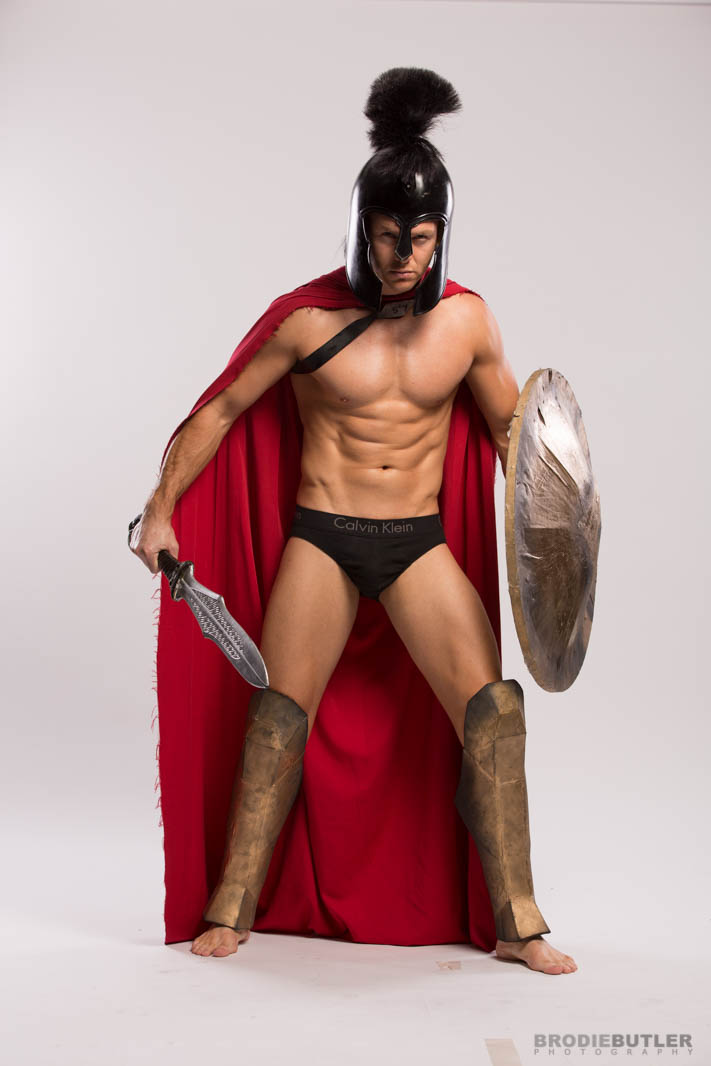
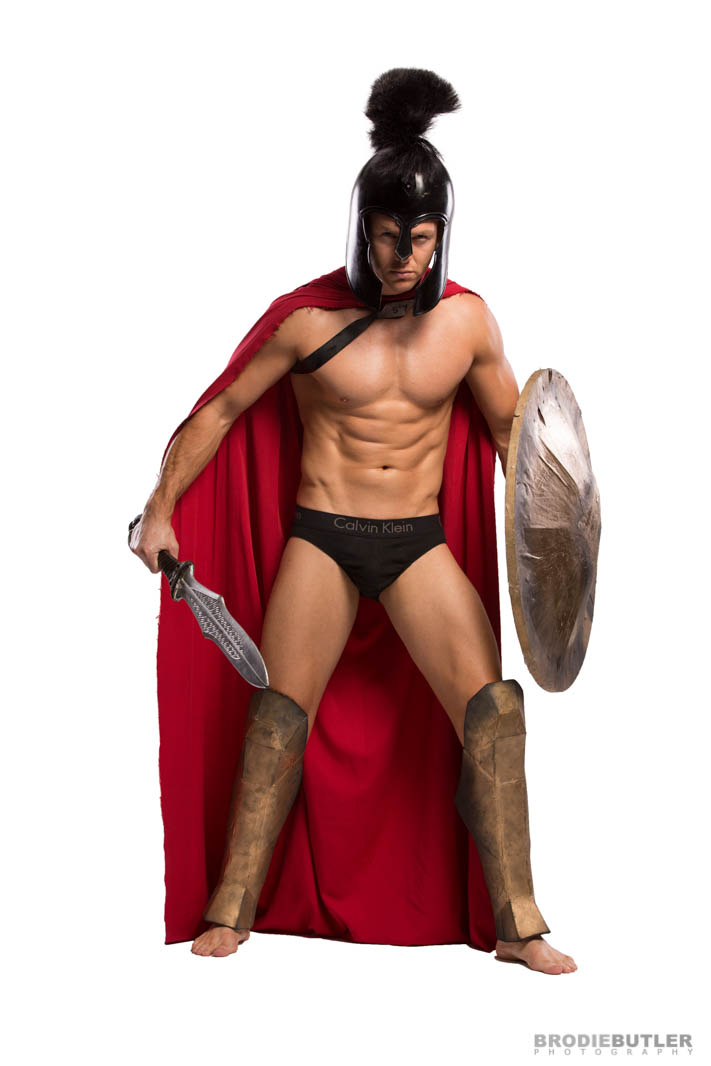
This is what the individual shots look like. Shot on a simple white seamless paper backdrop which usually turns grey when you’re not specifically lighting it. The only reason for the background is to allow a clean and simple process of cutting out the spartan in photoshop. You could easily use a blue, green or any other plain background for this process. If using coloured backgrounds though, you need to be careful of something called radiosity. Probably more commonly referred to in this industry as “bleed”. If you use a blue background, know that the blue is going to contaminate your subject. You will see a blue tinge around the edges, so you will need to adjust for that in post.
THE BACKGROUND
Piecing together backgrounds isn’t always easy. It requires a blend of the correct perspective and angles and trying to find stock images that suit your purpose is a very time intensive process. The best way to do it, is to build up a catalog of what I call “backplates”. Wherever I go I am always photographing the skies and landscapes as well as textures and walls to build my own backplate library up for use in future photoshop composites like this one. That will take time obviously, so get started!
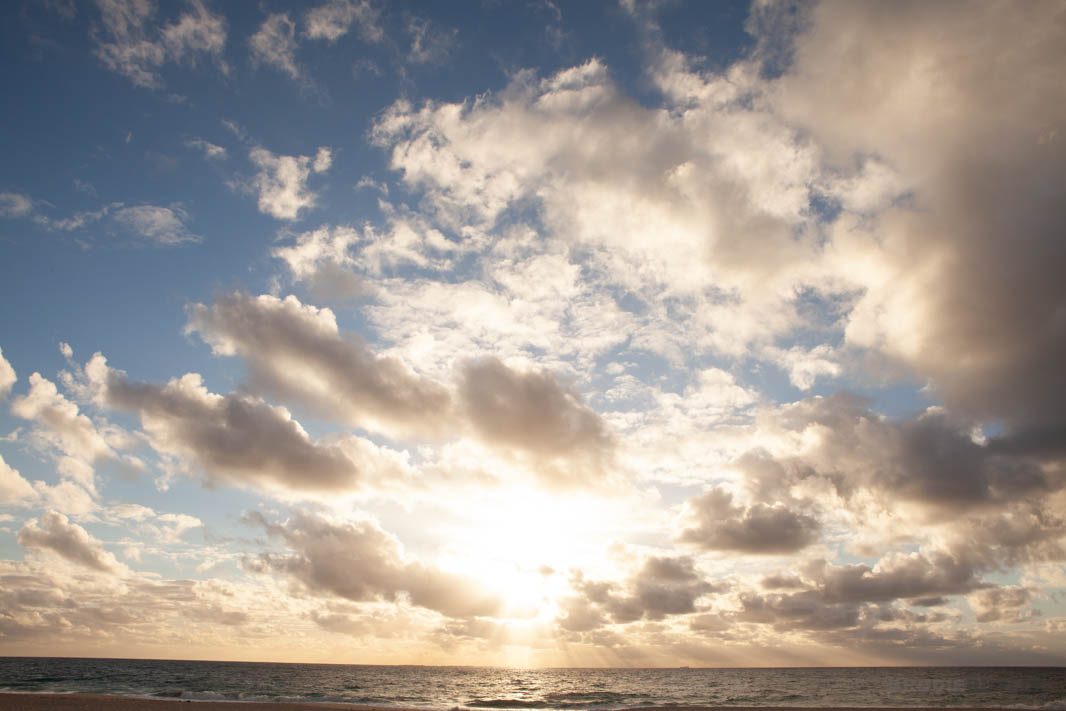
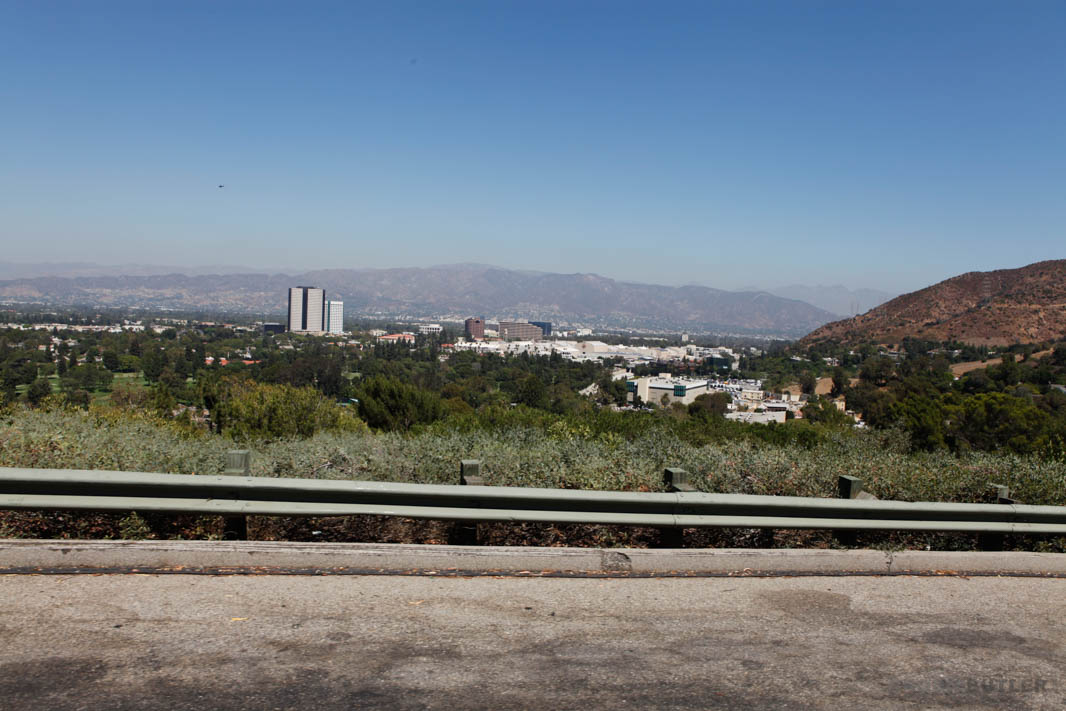
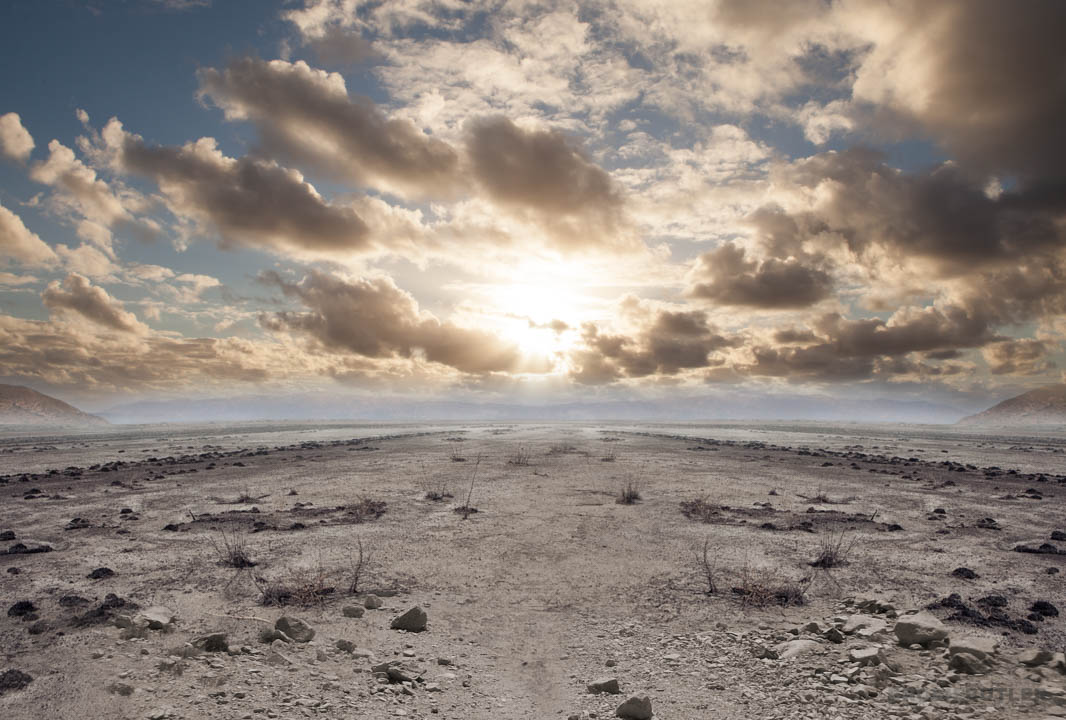
The background composite I used for this comprises of 3 main images. A sunset photo that I shot years ago at City beach in Perth, which was actually during a bikini photoshoot. Tough life, I know. The second image which made up my mountains in the distance was actually photographed at Universal Studios in Los Angeles. As you can see I have had to remove buildings, a plane, power lines and all the houses built into the mountain. I dont imagine there was too many of those in Spartan times.
The last image to make up the earth the Spartans stand on, was a landscape taken in Wyaltkatchem, a town about 192km east-north-east of Perth in Western Australia. I was out there flying around in a helicopter shooting footage and images of cars for the debut of Racewars; a drag racing car event going from strength to strength here in W.A. This backplate was shot specifically with a composite in mind, so the landscape photo in itself is not very exciting, but it provided the perfect base for Spartans.

And the result…
SUPERIMPOSING THE SPARTANS
Now for the crucial part of adding the spartans to the scene and making them look like they belong. This is where most photographers and retouchers come unstuck. If you dont blend your subjects into the background correctly it can make the final piece look completely fake. Obviously the perspective of your scene and your subjects needs to be matching because if you get this wrong it’s something that will stand out like an elephant in the room.
Matching the colours of your background to your subject is also very important and a very common mistake a lot of photographers make. Here are two tutorials on how to match colours: Matching Colours Tutorial with Fireman AND Start to finish photoshop composite tutorial
The last thing I will touch on, is shadows. Shadows can be tricky to get right and even I often look back on old photos and want to re-do them. Here is a before and after below of the shadows I applied. I usually start with a distinctive dark but shallow shadow outline around the base, then I move to a softer brush and work the shadow outwards from the feet and cape. This is all done on a relatively low opacity so I can build it up as required.
Then an important part is to darken the body as well. A lot of people miss this step which throws off the final look. I often create a new layer and set it to multiply. This will darken the image, then using a mask I paint in the areas i want affected which in this case was the feet and legs.

THE SPEED RETOUCH
As with all my recent photoshop composites I record a Speed Retouching video so you can see the process of it being made from start to finish. While this one took me two days there was a lot of back and forth on creative decisions, and exploring differnet arrangements with the characters as well as manipulating the background in different ways. So to be fair it didnt require 2 whole days of effort to create the final piece but it still took me 2 days. To keep this speed retouching video down to only a few minutes I removed some of the said “back and forth” and just tried to make it look as linear as possible.
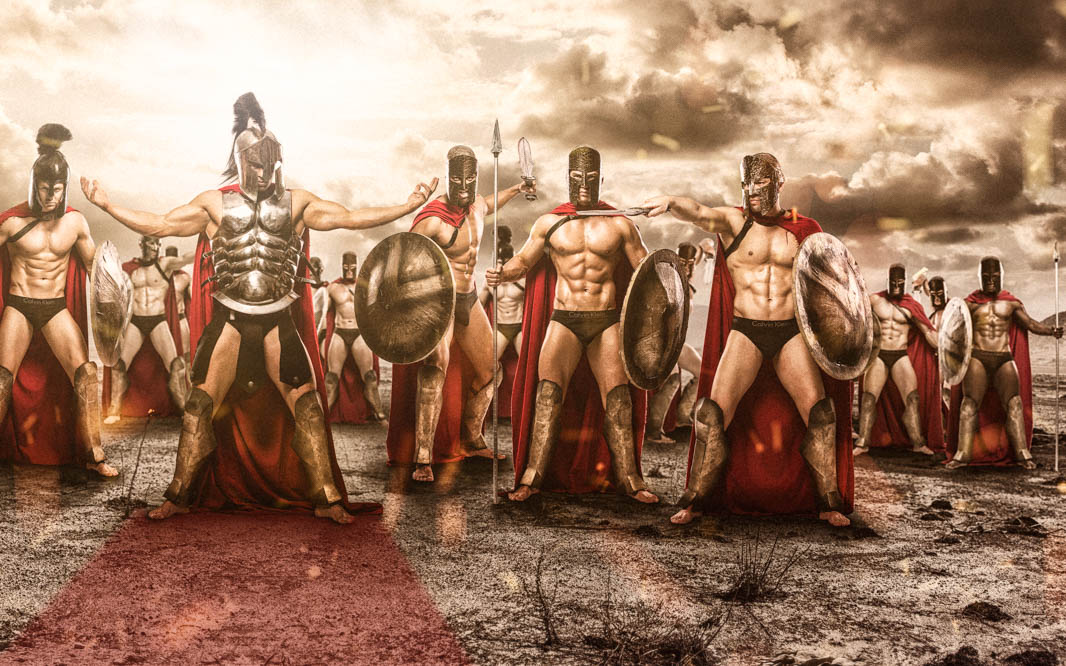
THE FINAL RESULT
So when you put it all together with a little flair, it looks just like this… (click for large)

Above is the uncropped 230 megapixel version, obviously in a web-friendly size. Below are a few cropped versions that show off the detail a bit more.